![]()
![]()
![]()
![]()
![]()
![]()
![]()
![]()
![]()
![]()
![]()
![]()
El sitio de internet en español para los modelistas militares dedicados a la Primera Guerra Mundial
Inicio Presentación Preguntas frecuentes Artículos Revisiones Galería Lista de kits
Cañón de campaña británico de tiro rápido de 18 libras (Emhar, 1/35)
Autor: Chris Anderson
Este artículo en inglés y las fotos que lo acompañan han sido realizados por Chris Anderson. La traducción es de José Luis Chinchilla. Por ser un artículo traducido, se incluye el artículo original en inglés.
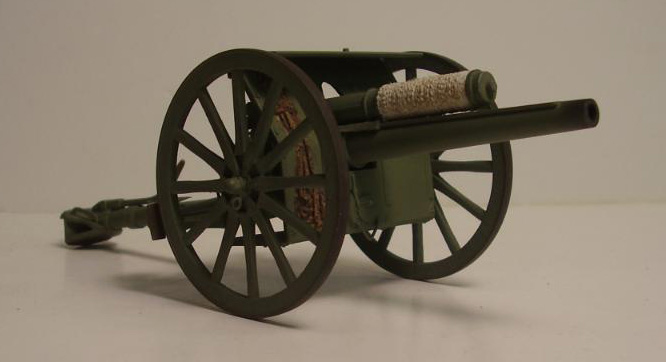
Yo construyo sólo maquetas de la Primera Guerra mundial y no hay muchas en el mercado a 1/35. Se pueden comprar caros kits en resina, hacer un “scratch build” completo o tomar un kit que no sea caro y hacer algunas modificaciones y añadir detalles ausentes. Yo hago lo último, principalmente. Creo que cualquier kit se puede usar con algunas mejoras.
He leído muchas malas cosas sobre los kits de Emhar, pero pienso que pueden ser usados como una buena base. Compré este kit de Emhar por unos siete dólares. La investigación que realicé sólo me costó tiempo y los detalles los hice con trozos de plástico, hilo de cobre y papel.
Lo primero que hay que hacer es documentarse. Encontré la mejor fuente en Internet, un gran sitio para las cosas de la Gran Guerra es http://www.landships.freeservers.com/index.htm . Encontré muchas fotos del tema y leí toda la información que pude antes de comenzar.
Unas palabras de advertencia: no soy un experto en este tema, pero intento hacer lo más razonable cuando tengo alguna duda.
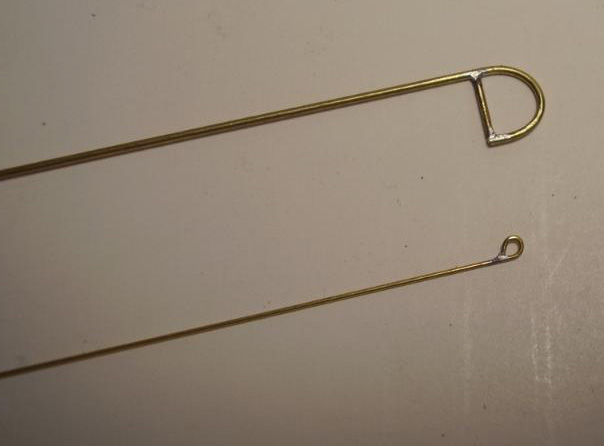
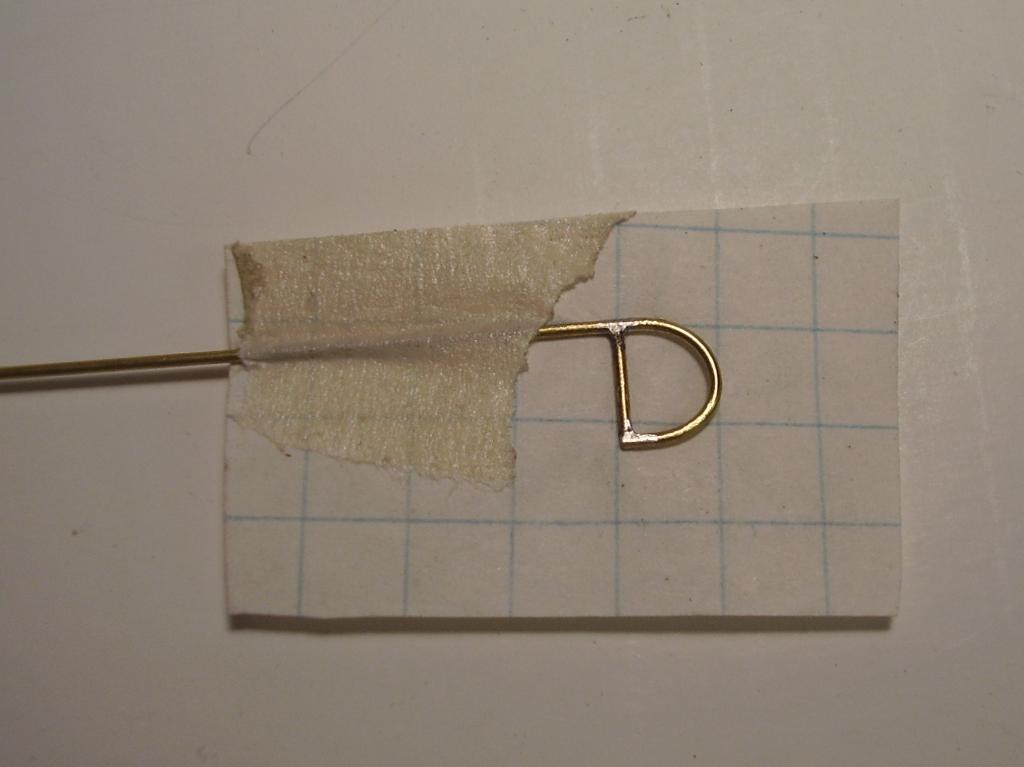
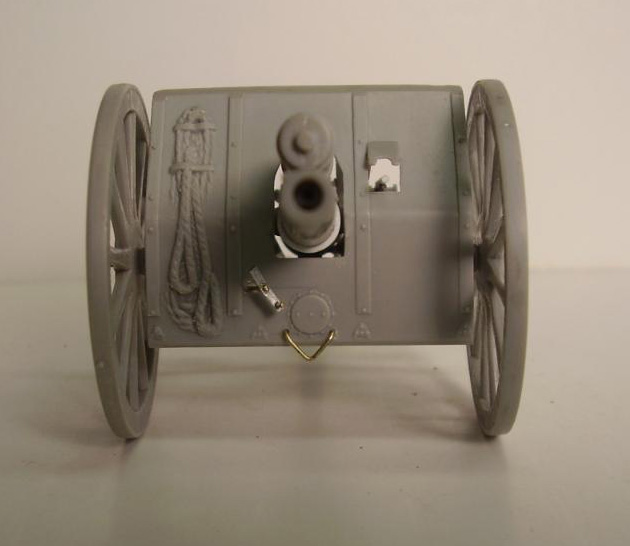
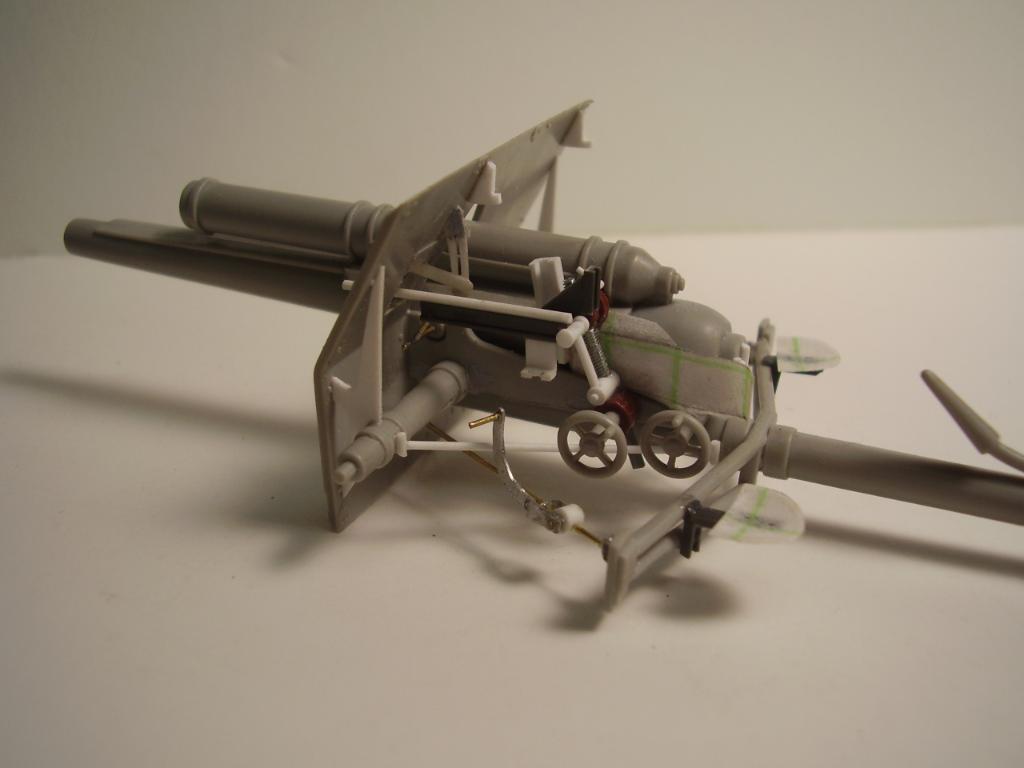
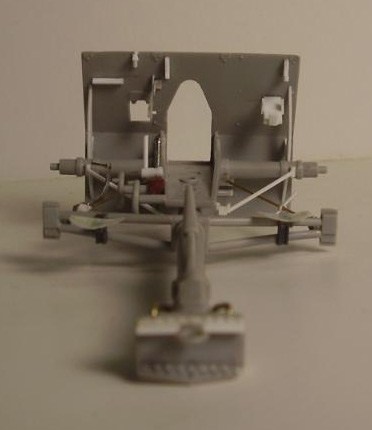
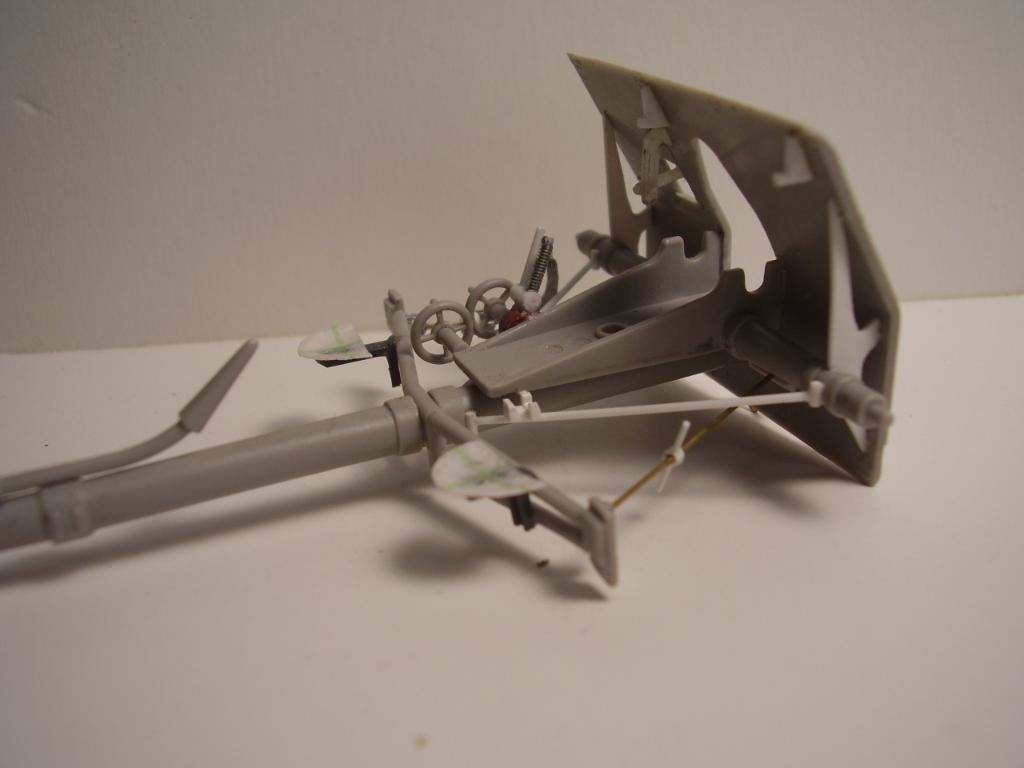
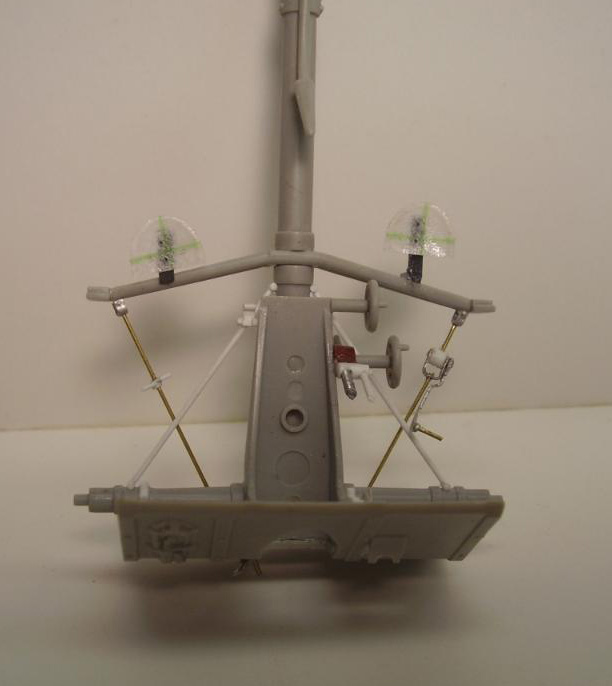
Mirando el kit, decidí cortar el escudo en tres parte, de manera que pudiera mostrarlo doblado. También quité los dos asientos e hice otros nuevos. En las fotos, los asientos parecen estar hechos de lámina metálica estampada. Para hacer el metal estampado usé papel, cubierto con pegamento (a esto lo llamo “el fotograbado del pobre”). Primero hice un armazón de hilo de cobre, luego presioné un trozo de papel sobre él para dar la impresión de enrollado alrededor del borde. Hay que cortar trozos de papel con pegamento para hacerlos fuertes antes de cortar el trozo. Otras partes de papel que añadí incluyen las coberturas sobre el deslizador del recuperador, el guardamano en el cierre y las tiras de cuero.
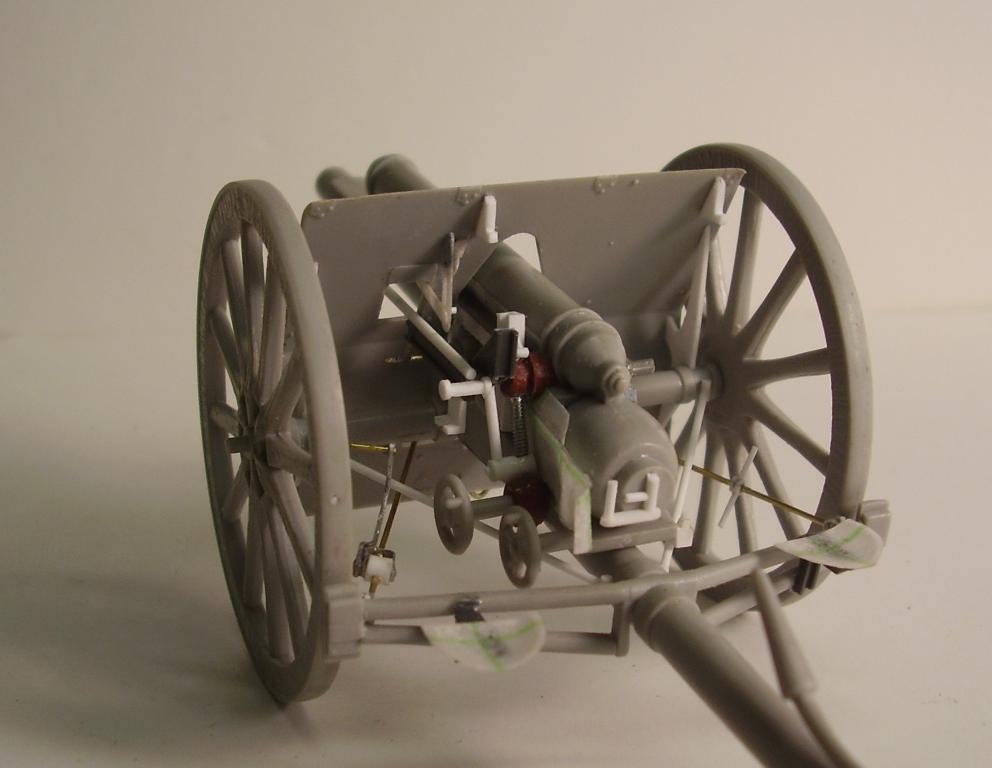
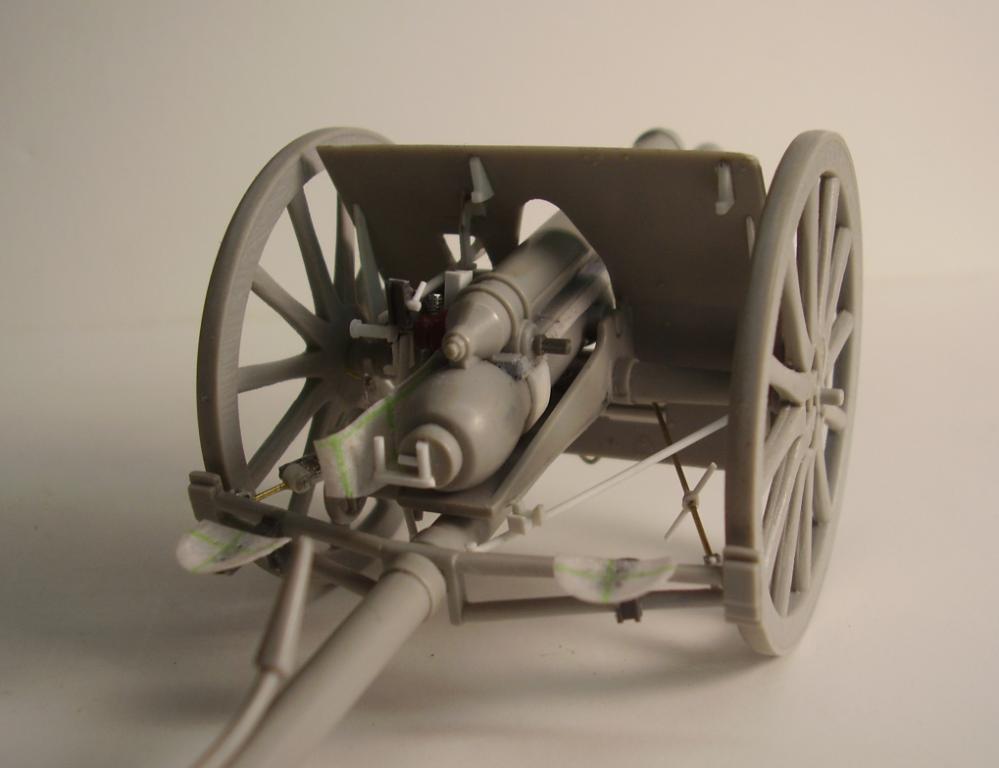
Probé a hacer un sistema de freno razonable usando cobre y tubos de plástico. Hay un dispositivo de manivela de tensión en el lado izquierdo: lo construí totalmente. Después de abrir la zona alrededor de la abertura del arma hice el cierre deslizante. La principal modificación se hizo en el arado del mástil. También añadí un tornillo de elevación y taladré el cañón. Hay mucho trabajo que hacer en la parte trasera del escudo la barra de elevación, la pala y los contenedores de cuero. La mira se hizo torneando un tubo de plástico con mi Dremel. También enrollé el recuperador con hilo, para simular la cuerda que se usaba. Los cubos del eje se tornearon y se fijaron con remaches de latón hechos por mí.
Espero que este artículo os inspire para ver lo que podemos hacer por poco dinero, mejorando una maqueta sencilla. El coste total sin incluir pegamento, pintura, latón o plástico es de siete dólares. Algo bueno de rehacer un kit sencillo es que puedes hacer tanto como quieras, el único al que debes de satisfacer es a ti mismo.
Gracias.
Chris Anderson
![]()
Emhar British 18-pounder QF field gun, 1/35
by Chris Anderson
 I build only W.W.1 subjects and there is not a lot on the market in 1/35 scale.
You can buy expensive resin kits, do a complete scratch build or take an
inexpensive kit and do some modification and add missing details. I mostly do
the latter. I think any box kit can use some fixing up.
I build only W.W.1 subjects and there is not a lot on the market in 1/35 scale.
You can buy expensive resin kits, do a complete scratch build or take an
inexpensive kit and do some modification and add missing details. I mostly do
the latter. I think any box kit can use some fixing up.
I have read a lot of bad things about Emhar's kits. But I think they can be
used as good foundation. I bought this Emhar's kit for about $7.00 U.S. The
research I did only cost me time and the details I made from bits of
plastic,brass wire,and paper.
The first thing to do is research. I find the best source is the internet. A
great site for W.W.1 stuff is
http://www.landships.freeservers.com/.I
find as many pictures of the subject and read as much information as I can
before I start.
A word of warning I am not an expert on this subject, but try to make
the most reasonable guess when in doubt.
Looking at this kit, I decided to cut the splinter shield into three pieces so I
could show it folded. Also I removed the two seats and made new ones. In the
pictures the seats look to be made of stamped sheet metal. To make sheet metal I
use paper, coated with CA glue. [I call this my poor man's photo etch] First I
made a temporary form out of brass wire then I press a piece of paper over it to
make an impression of the roll around the edge. You have to coat paper parts
with glue to make them strong after cutting out the piece. Other paper parts I
added include covers over the recuperator slides, the hand guard at the breach
and the leather straps.
I tried to make a reasonable brake system using brass and plastic rods for
the linkage. There is a tension handle device on the left side, it was scratch
built. After opening up the area around the gun site door I made the sliding
lock for the hinge. Major modification was done to the spade on the tail. I also
added an elevation screw and drilled out the barrel. There is so much stuff I
could add to the back side of the shield, I decided on the wooden elevation rod,
shovel, and leather storage containers. The scope was made by turning down a
piece of plastic rod in my Dremel tool. I also wrapped the recuperator with
thread to simulate the rope that was used.The axle hubs where drilled and fitted
with brass eye bolts [home made].
I hope this article will inspire you to look at what can be done, for little
to no money,to make a simple model better. The total cost not including paint,
glue, or bits of brass and plastic [which I already had] was $7.00 U.S. A great
thing about re-doing a simple kit is you can do as little or as much as
little as you want, the only one you have to please is yourself.
Thank You
Chris Anderson
![]()
Para ver las imágenes de la maqueta terminada, pinchar aquí.
Para volver a la página principal de Artículos, pinchar aquí.